
Contents
- 01“White is required” is a myth — the real rule is “plain background”
- 02Why “clothing or hair blending into the background” fails
- 03Background color by document — quick reference
- 04Choosing white, blue or gray (job hunting & resumes)
- 05Background colors for overseas visas & passports (US, China, Korea, Europe)
- 06How to make one with a freely chosen background color
- 07FAQ
In Japan, you assume a Japanese ID photo background “has to be white,” shoot in white clothing against a white background, and at the counter you’re told the “outline is hard to make out” and sent back for a reshoot. In fact, this is a textbook failure that repeats every year. What Japanese official documents actually require is not “white” but the condition of a “plain background with no shadows or patterns.”
In this article, we first confirm the fact that white is not required in the original text of the official specs, then explain the real reason background color still trips people up (blending with clothing or hair). On top of that — from passport and My Number to job hunting and overseas visas — we organize which color is safe to choose by document in a quick-reference table.
“White is required” is a myth — the real rule is “plain background”
Many explainer articles state that “a Japanese ID photo must have a white background,” but when you read the official document specs in the original, what’s required is not the color itself but that it be “plain” and that “no shadows, patterns or objects appear in the shot.”
- Residence card (Immigration Services Agency) — “no background (including shadows).” No color is specified; the condition is a “plain background,” shadows included.
- Passport (Ministry of Foreign Affairs) — the condition is a “plain background” with no background, shadows, patterns, objects or gradation, and white is positioned as “recommended.” It is not a case of “anything but white is rejected.”
- My Number card — “front-facing, hatless, with a plain background.” Again no color is specified; the condition is the absence of shadows or patterns.
Why “clothing or hair blending into the background” fails
The biggest cause of a background-color reshoot isn’t that “the color is wrong,” but that your clothing or hair is a similar shade to the background, so the outline blends in. This is spelled out clearly in the official rejection criteria, too.
- Tokyo Metropolitan Police (bring-your-own photo for a driver’s license) — as an example of a rejected photo, they explicitly list one where “the outline of the face or the clothing blends into the background.”
- Ministry of Foreign Affairs / prefectures (passport) — “if the hair color and the background are similar shades and the outline is hard to make out, we may ask you to retake the photo.”
Background color by document — quick reference
For the main documents, we’ve organized “the official condition” and “the color we recommend in practice.” The big difference: every Japanese official document specifies no color and only requires a plain background, while many countries clearly specify a white-family background for overseas visas.
| Passport (Japan) | Plain background, no shadows/patterns (white recommended) |
|---|---|
| My Number card | Plain background, no shadows (no color specified) |
| Residence card | No background (including shadows) |
| Driver’s license (own photo) | Plain background (no color specified) |
| Job hunting / resume | No official rule (convention) |
| U.S. visa / passport | White or off-white |
| China visa | White (or near-white) |
| Korea passport / visa | White (white ground, no border) |
| Schengen (Europe) | Bright plain background (strict in some countries) |
For detailed sizes and specs per document, you can check by destination from the list of 105 supported specs.
Choosing white, blue or gray (job hunting & resumes)
Job-hunting and resume photos have no official color rule, and the three standard choices are white, light blue and light gray. Each gives a different impression (the following are guidelines based on convention, drawn from the explanation by the major photo-studio chain Camera no Kitamura).
Whichever you choose, you won’t be “rejected.” The trick to avoiding failure is to choose based on the color that brings out your outline most cleanly given your own clothing color and skin brightness. We’ve summarized the points to watch for job-hunting photos themselves in the truth about job-hunting photos from recruiters.
Background colors for overseas visas & passports (US, China, Korea, Europe)
Whereas Japanese official documents take “any color, as long as it’s plain,” overseas visas are characterized by many countries clearly specifying a white-family background. Take particular care if you are a foreign national living in Japan applying for your home country’s passport or visa.
Detailed sizes and specs by country are summarized on each page: U.S. visa, China visa, Korea visa and Schengen visa.
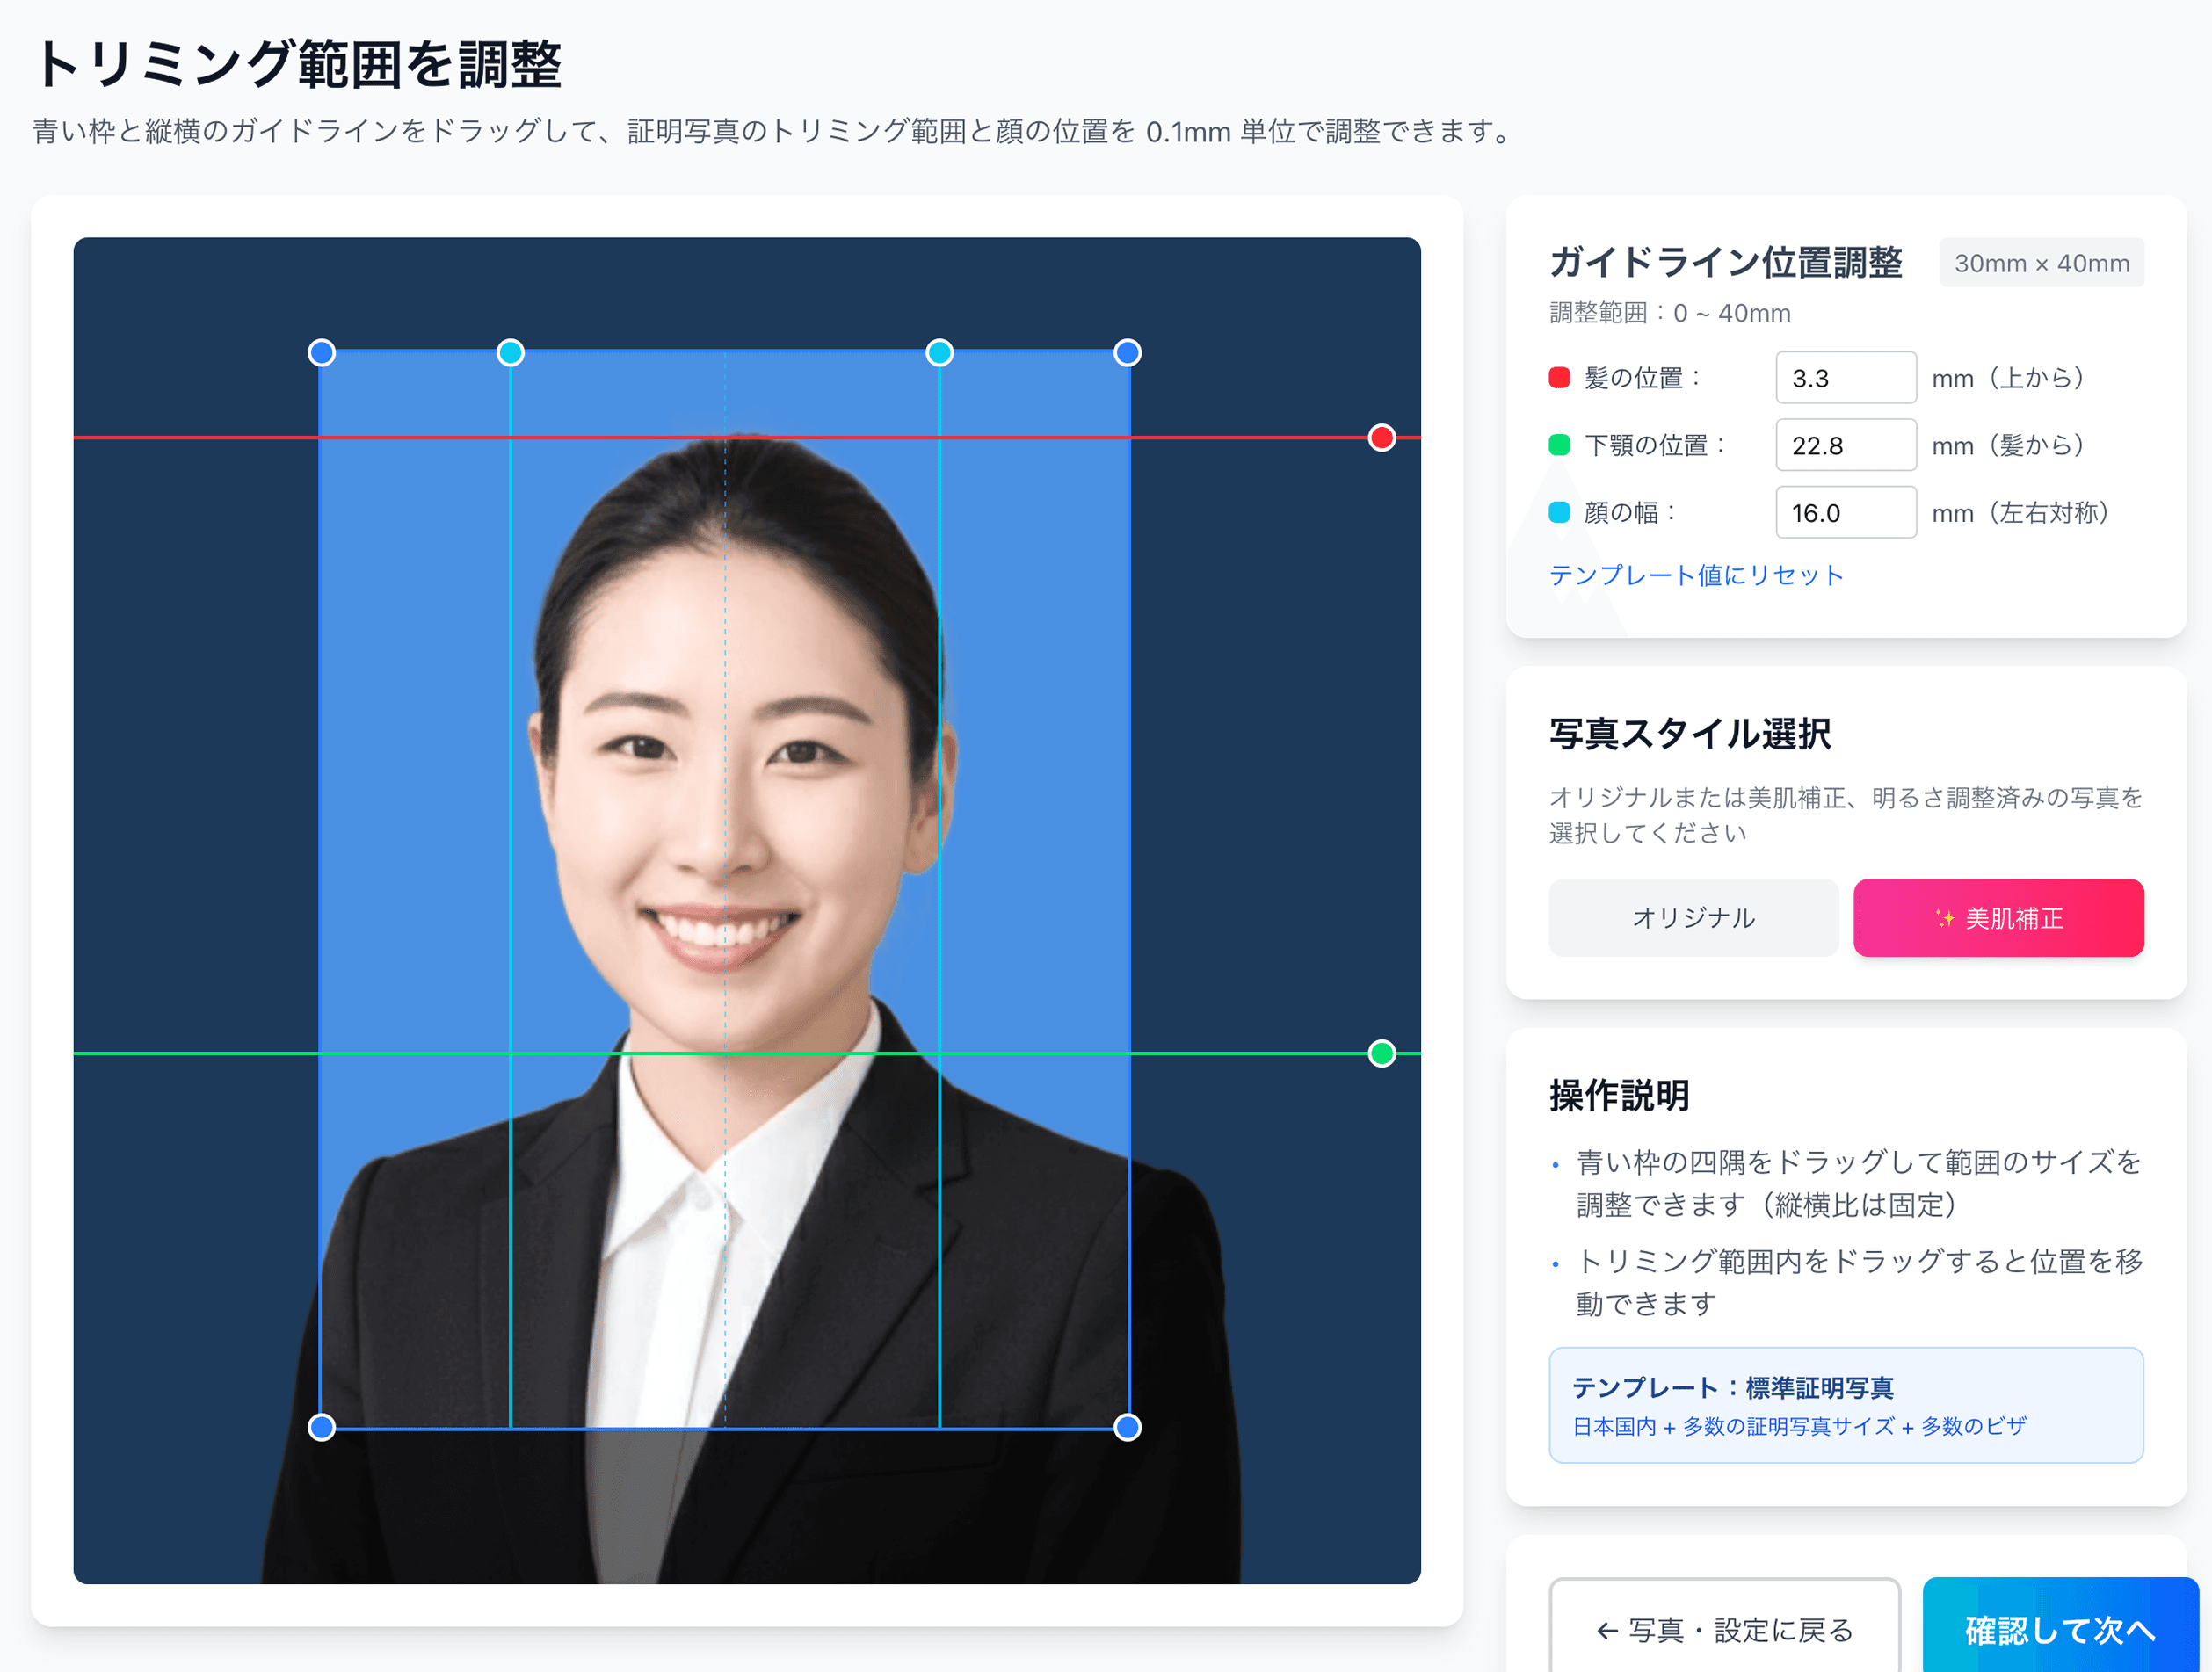
How to make one with a freely chosen background color
You don’t have to lock in the background color at the moment of shooting. Remove the background with AI and, after taking the photo, you can freely replace it with white, light blue, light gray or any custom color. Pick a color to match where you’re submitting, and choose the single shot where your outline comes out cleanest.
- 1
Shoot in front of a plain wall
With your smartphone, shoot from the front against as plain a wall as possible. Since AI replaces the background, the wall’s color doesn’t matter. A spot with natural light falling evenly on your face gives a more natural finish.
- 2
Pick a spec and upload
Choose your destination (passport, My Number, job hunting and so on) from the 105 specs and send the photo, and AI automatically removes the background and provisionally positions your face.
- 3
Choose the background color
Switch to white, light blue, light gray or any custom color. You can compare in the preview and pick the color that brings out your outline clearly given your own clothing and hair.
- 4
Pay ¥200 and receive the print sheet
A sheet is prepared with several copies laid out on L-size paper with cut marks. Before payment, you can change the color and position and check as many times as you like.
- 5
Print at a convenience store
At a major convenience store’s multi-copy machine, just hold up the QR code. You can print L-size for ¥30–¥40, and cutting along the cut marks finishes it. The steps are explained in detail in our convenience-store printing guide.
Reference links
- All 105 supported specs
- My Number photo specs
- Passport photo specs
- Residence card photo specs
- Convenience-store printing steps
- 12 passport rejection patterns
- Why 80% of My Number photos fail
- The truth about job-hunting photos from recruiters
- Pricing details
FAQ
Does an ID photo background have to be white?
What background color is best for a job-hunting or resume photo?
What background color should I use with light clothing or light hair?
What is the background color for a U.S. visa or passport?
Can I change the background color after taking the photo?
No more wavering over background color — compare white, blue and gray for ¥200
Shooting ¥200 + convenience-store L-size ¥30 = ¥230 total. AI removes the background automatically, and you can switch to white, light blue, light gray or any color to match where you’re submitting. Pick the one shot where your outline comes out cleanest, reshoot-free, before you print.
Create an ID photo for ¥200Ramune Editorial ・ Published: June 15, 2026
Facts in this article are verified against primary official sources before publication.