Free to try — upload a phone photo and preview your AI-processed result. Pay ¥200 only if you like it
📸Free to try — upload a phone photo and preview your AI-processed result. Pay ¥200 only if you like it📸Free to try — upload a phone photo and preview your AI-processed result. Pay ¥200 only if you like it📸Free to try — upload a phone photo and preview your AI-processed result. Pay ¥200 only if you like it📸Free to try — upload a phone photo and preview your AI-processed result. Pay ¥200 only if you like it📸Free to try — upload a phone photo and preview your AI-processed result. Pay ¥200 only if you like it📸Free to try — upload a phone photo and preview your AI-processed result. Pay ¥200 only if you like it
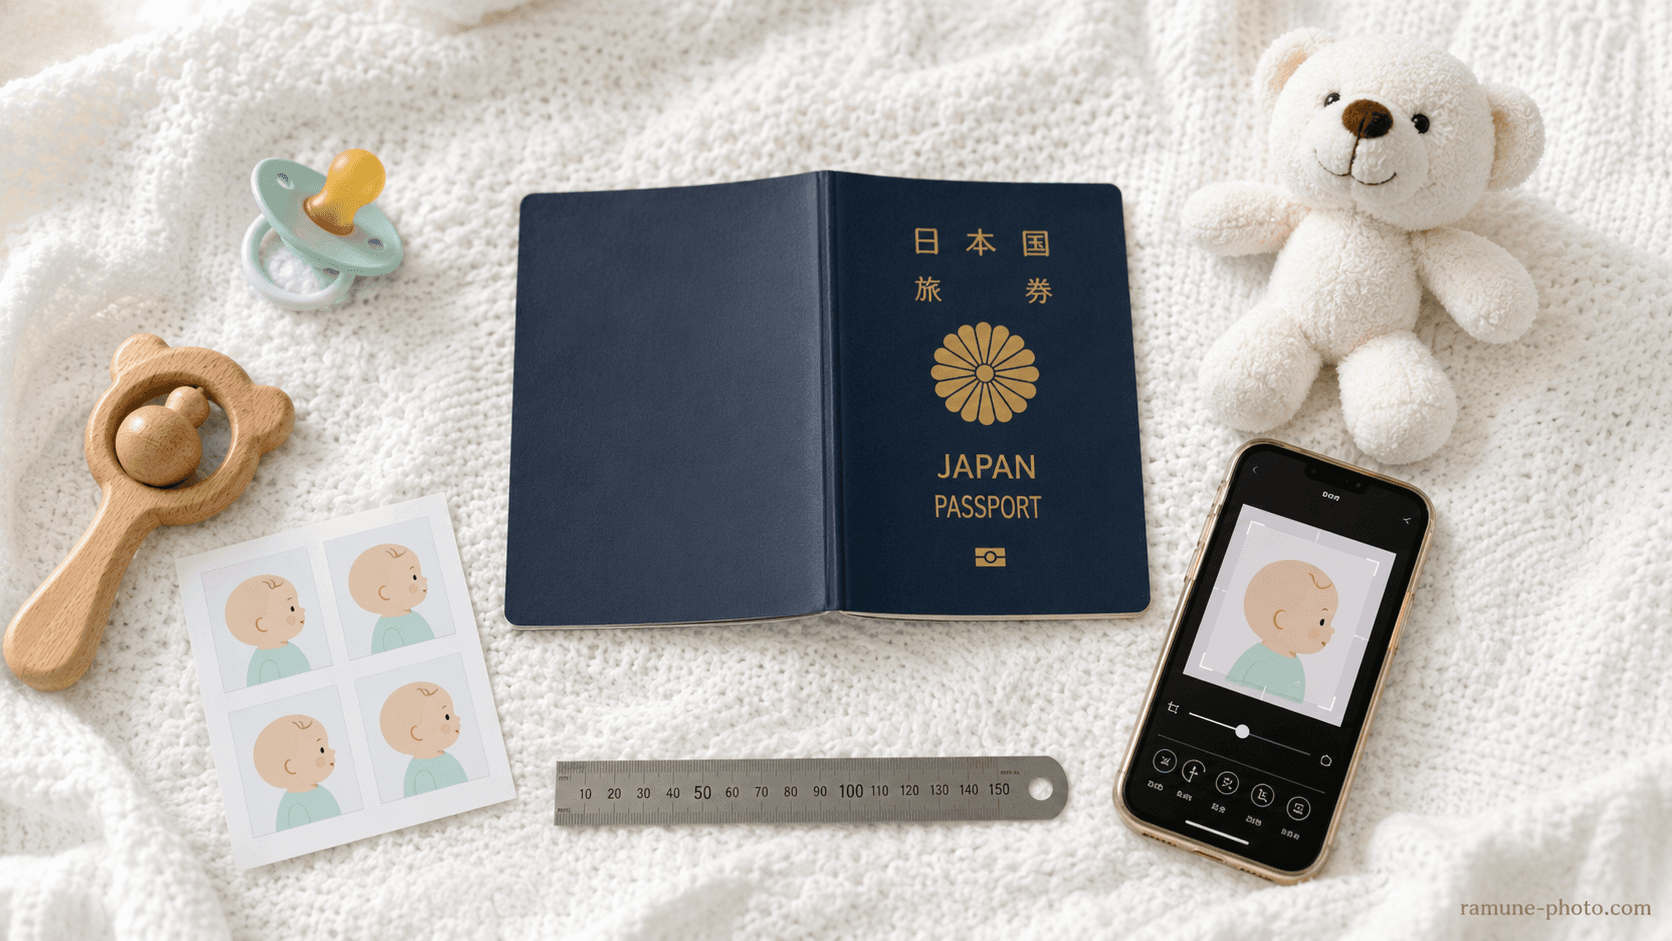
Japanese Baby Passport Photo at Home: 7 Tips (Infant Spec)
For a Japanese baby passport, the whole face including ears is OK even under 32mm. The hard part is the plain background. 7 home tips + AI fix, print for ¥200.
In Japan, your baby’s first trip abroad ── whether it’s a visit home or a family holiday ── means applying fora Japanese passport in the baby’s own name. The biggest hurdle is the “photo” ── the head won’t stay up, the eyes won’t meet the lens, the expression collapses into a laughing-crying mess, and a parent’s hand or clothing creeps into the frame. It’s nearly impossible in a photo booth, and a studio costs close to ¥10,000 ── a struggle most families go through.
Under 32mm is OK
As a special allowance for infants, the Ministry of Foreign Affairs states explicitly that “even if the vertical face height is under 32mm, it is fine as long as the entire face, including the ears, fits within the photo.”
This article pulls together the official guidance from the Ministry of Foreign Affairs, Tokyo and Osaka, and walks through the process — from0–6-month babies before head controltoactive toddlers aged 6 months to 2 years— of shooting on a smartphone at home, adjusting to spec with AI, and printing an L-size sheet at a convenience store for ¥30. The total comes to¥230, one-tenth the cost of a photo studio.
Why baby passport photos are hard
Japanese passport photos are strictly defined by the Ministry of Foreign Affairs in itsfacial-photo specifications, in line with ICAO recommendations. The size is45mm tall × 35mm wide, the face height is32–36mm, and the margin above the crown of the head is2–6mm. Because it’s used for facial recognition at automated immigration gates, “looks about right” won’t pass.
Trying to apply this spec to a child aged 0 to 2 runs into three hurdles you never face with an adult.
Clearing these hurdles not with “¥10,000 at a photo studio” but byshooting plenty of frames at home and fixing them with AIis the theme of this article.
The infant spec the Ministry of Foreign Affairs allows
While the Ministry of Foreign Affairs takes the same spec as for adults as its baseline, it spells out a special allowance for infants within itsspecifications for passport application photos. Local-government passport centers, such as those in Tokyo and Osaka, follow the same practice.
Infant passport photo spec (common to the Ministry of Foreign Affairs, Tokyo and Osaka)
Photo size
45mm tall × 35mm wide
Same as adults
Vertical face height
In principle 32–36mm (34±2mm)
If a round face won’t fit, the whole face including the ears is OK
Crown to top edge of photo
2–6mm (4±2mm)
Same in principle
Gaze
Squarely toward the camera lens
Eyes must be open
Expression
Neutral expression
Extreme smiling / laughing-crying is a no-go
Background
Plain (white recommended)
Sheet creases, patterns and shadows are a no-go
Assisting person
Must not appear
When holding the baby, keep the parent’s body out of view
When it was taken
Within 6 months before the application date
A fresh photo is recommended since babies grow fast
This allowance exists to prevent the failure where, trying to follow the spec strictly, youget the camera too close and the crown ends up off-frame. In practice, “a pulled-back composition shot from a distance, then cropping just around the face with AI” leads to fewer failures.
Method by age (0–6 months / 6–24 months)
0–6 months (a baby who can’t hold their head up)
For a baby who can’t hold their head up, the Ministry of Foreign Affairs and Osaka state explicitly that“a photo taken from directly above, with the baby laid on a plain, pale-colored sheet or similar, is also acceptable.”The most practical approach is the lying-down shot: lay a plain white sheet (or a plain, pale-colored cloth) over a crib or the floor, place the baby on it, and shoot from directly above with a smartphone.
1
Pick a time when the baby is in a good mood
Aim for moments when the mood is stable — after feeding or a diaper change, just before or after a nap. When the baby is at the limit of hunger or sleepiness, you won’t get a good expression in the first place. Spotting the calmest 15 minutes of the day to shoot is the single biggest tip for cutting down the number of reshoots.
2
Lay down a plain white sheet and place the baby on it
On a crib, the floor or an adult bed, lay down a crease-free white sheet, towel or sheet of white paper A2 size or larger. If the sheet has creases, shadows show up in the background, so pull the edges taut with masking tape or clothespins to keep it tight.
3
Draw the gaze toward the camera with a toy or a sound
Hold the smartphone 50–70cm directly above the baby and bring a favorite toy or rattle near the camera. Having another family member say “ahh” beside the camera, or make a soft sound, makes it easier to lift the baby’s gaze.
4
Shoot 30–50 frames in burst mode
Set the smartphone camera to burst mode and, the instant the eyes meet the lens, press and hold to fire off several frames at once. Out of 30–50 frames, 1 or 2 will turn out to be the best shot — “eyes open, mouth closed, facing forward.” Repeat this for 2–3 sets to widen your choices.
5
Shoot in natural light; don’t use the flash
Shooting by a window on a cloudy day in the daytime gives the most even light on the face. Avoid direct sunlight, which casts strong shadows and highlights. Be sure to turn off the smartphone flash, as it causes red-eye and a shiny face.
6–24 months (from head control to walking)
From 6 months on, once the baby can hold their head up and sit, rather than the lying-down shot it becomes more practical toshoot from the front in a chair or on your lap. Around age 1, though, the baby can’t stay still, so combining a held shot with background replacement gives the highest success rate.
1
Sit in front of a white wall or a white sheet
Shoot in front of a white wall in your home, or a white sheet pinned or taped to the wall with masking tape. Even if the wallpaper has a faint pattern, AI background replacement can swap it for pure white, so it doesn’t have to be perfectly plain.
2
A parent holds the baby from behind while seated
A parent sits in a low chair or on the floor and supports the baby on their lap from behind. Slip the parent’s hands under the baby’s arms and keep them lower than the shoulders and face. You’ll replace the background with white using AI later, but take care that the parent’s face and shoulders don’t get into the frame.
3
The photographer shoots from a distance with zoom
Another family member shoots from 1.5–2m away using the smartphone’s zoom (2x optical or more). Keeping your distance suppresses lens distortion (the phenomenon where a wide-angle lens bloats the center of the face), giving more natural facial proportions.
4
Draw the gaze with a toy, and shoot in burst
Having the photographer hold a favorite toy directly above the smartphone, or operate a sound-making app, makes it easier to turn the gaze toward the camera. Here too, shoot 30–50 frames in burst mode.
5
Wipe drool with gauze before the next shooting set
Drool blurs the outline and is a cause of rejection. After one set, lightly wipe around the mouth with gauze, take a break, and shoot the next set. If you can take around 100 frames within 30 minutes, the odds are good that 1 or 2 will meet the spec.
8 examples that get rejected
Pulling together the public guidance from the Ministry of Foreign Affairs, Tokyo and Osaka, along with reshoot cases from several passport centers, the typical reasons a baby photo gets rejected boil down to these 8.
7 tips for getting it right with home + AI
With the spec and the failure cases in mind, here are7 tipsfor finishing reliably with home shooting + AI.
AI adjusts a 0–2-year-old’s photo to spec ── ¥200, unlimited reshoots
Just pick one frame from the 30–50 you shot at home and upload it. The AI replaces the background with pure white, adjusts the face position in 0.1mm steps, and finishes to the Ministry of Foreign Affairs’ infant allowance (whole face including the ears). Reshoots are free as many times as you like, even after payment.
Ramune AI ID Photo comes with processing tuned to the challenges of baby photos.
A baby cannot sit still in front of a plain wall, so you end up holding, swaddling or laying them down, which means a parent’s hand, cloth, or sheet creases and shadows easily creep into the background. Yet a passport requires a plain (white recommended) background. Ramune has the AI automatically replace the background with a plain one (white for a passport), and even for a wriggly baby it aligns the face position to spec with the red = hairline, green = chin, cyan = face width guidelines. The face itself is not retouched with skin-smoothing or reshaping; only the position is aligned and the background is set to a plain one. The booth at the station and other apps do not show you the exact position of the face down to the millimeter.
1
Select the passport spec and upload
From the spec selection screen, choose “Passport 35×45mm” and upload the best-turned-out frame from what you shot at home. Both a lying-down shot and a held shot are supported.
2
AI replaces the background with pure white
The AI automatically detects the outline of the face and body and replaces the background with pure white. Every element you couldn’t fully avoid while shooting — sheet creases, a parent’s hand, room furniture — is removed.
3
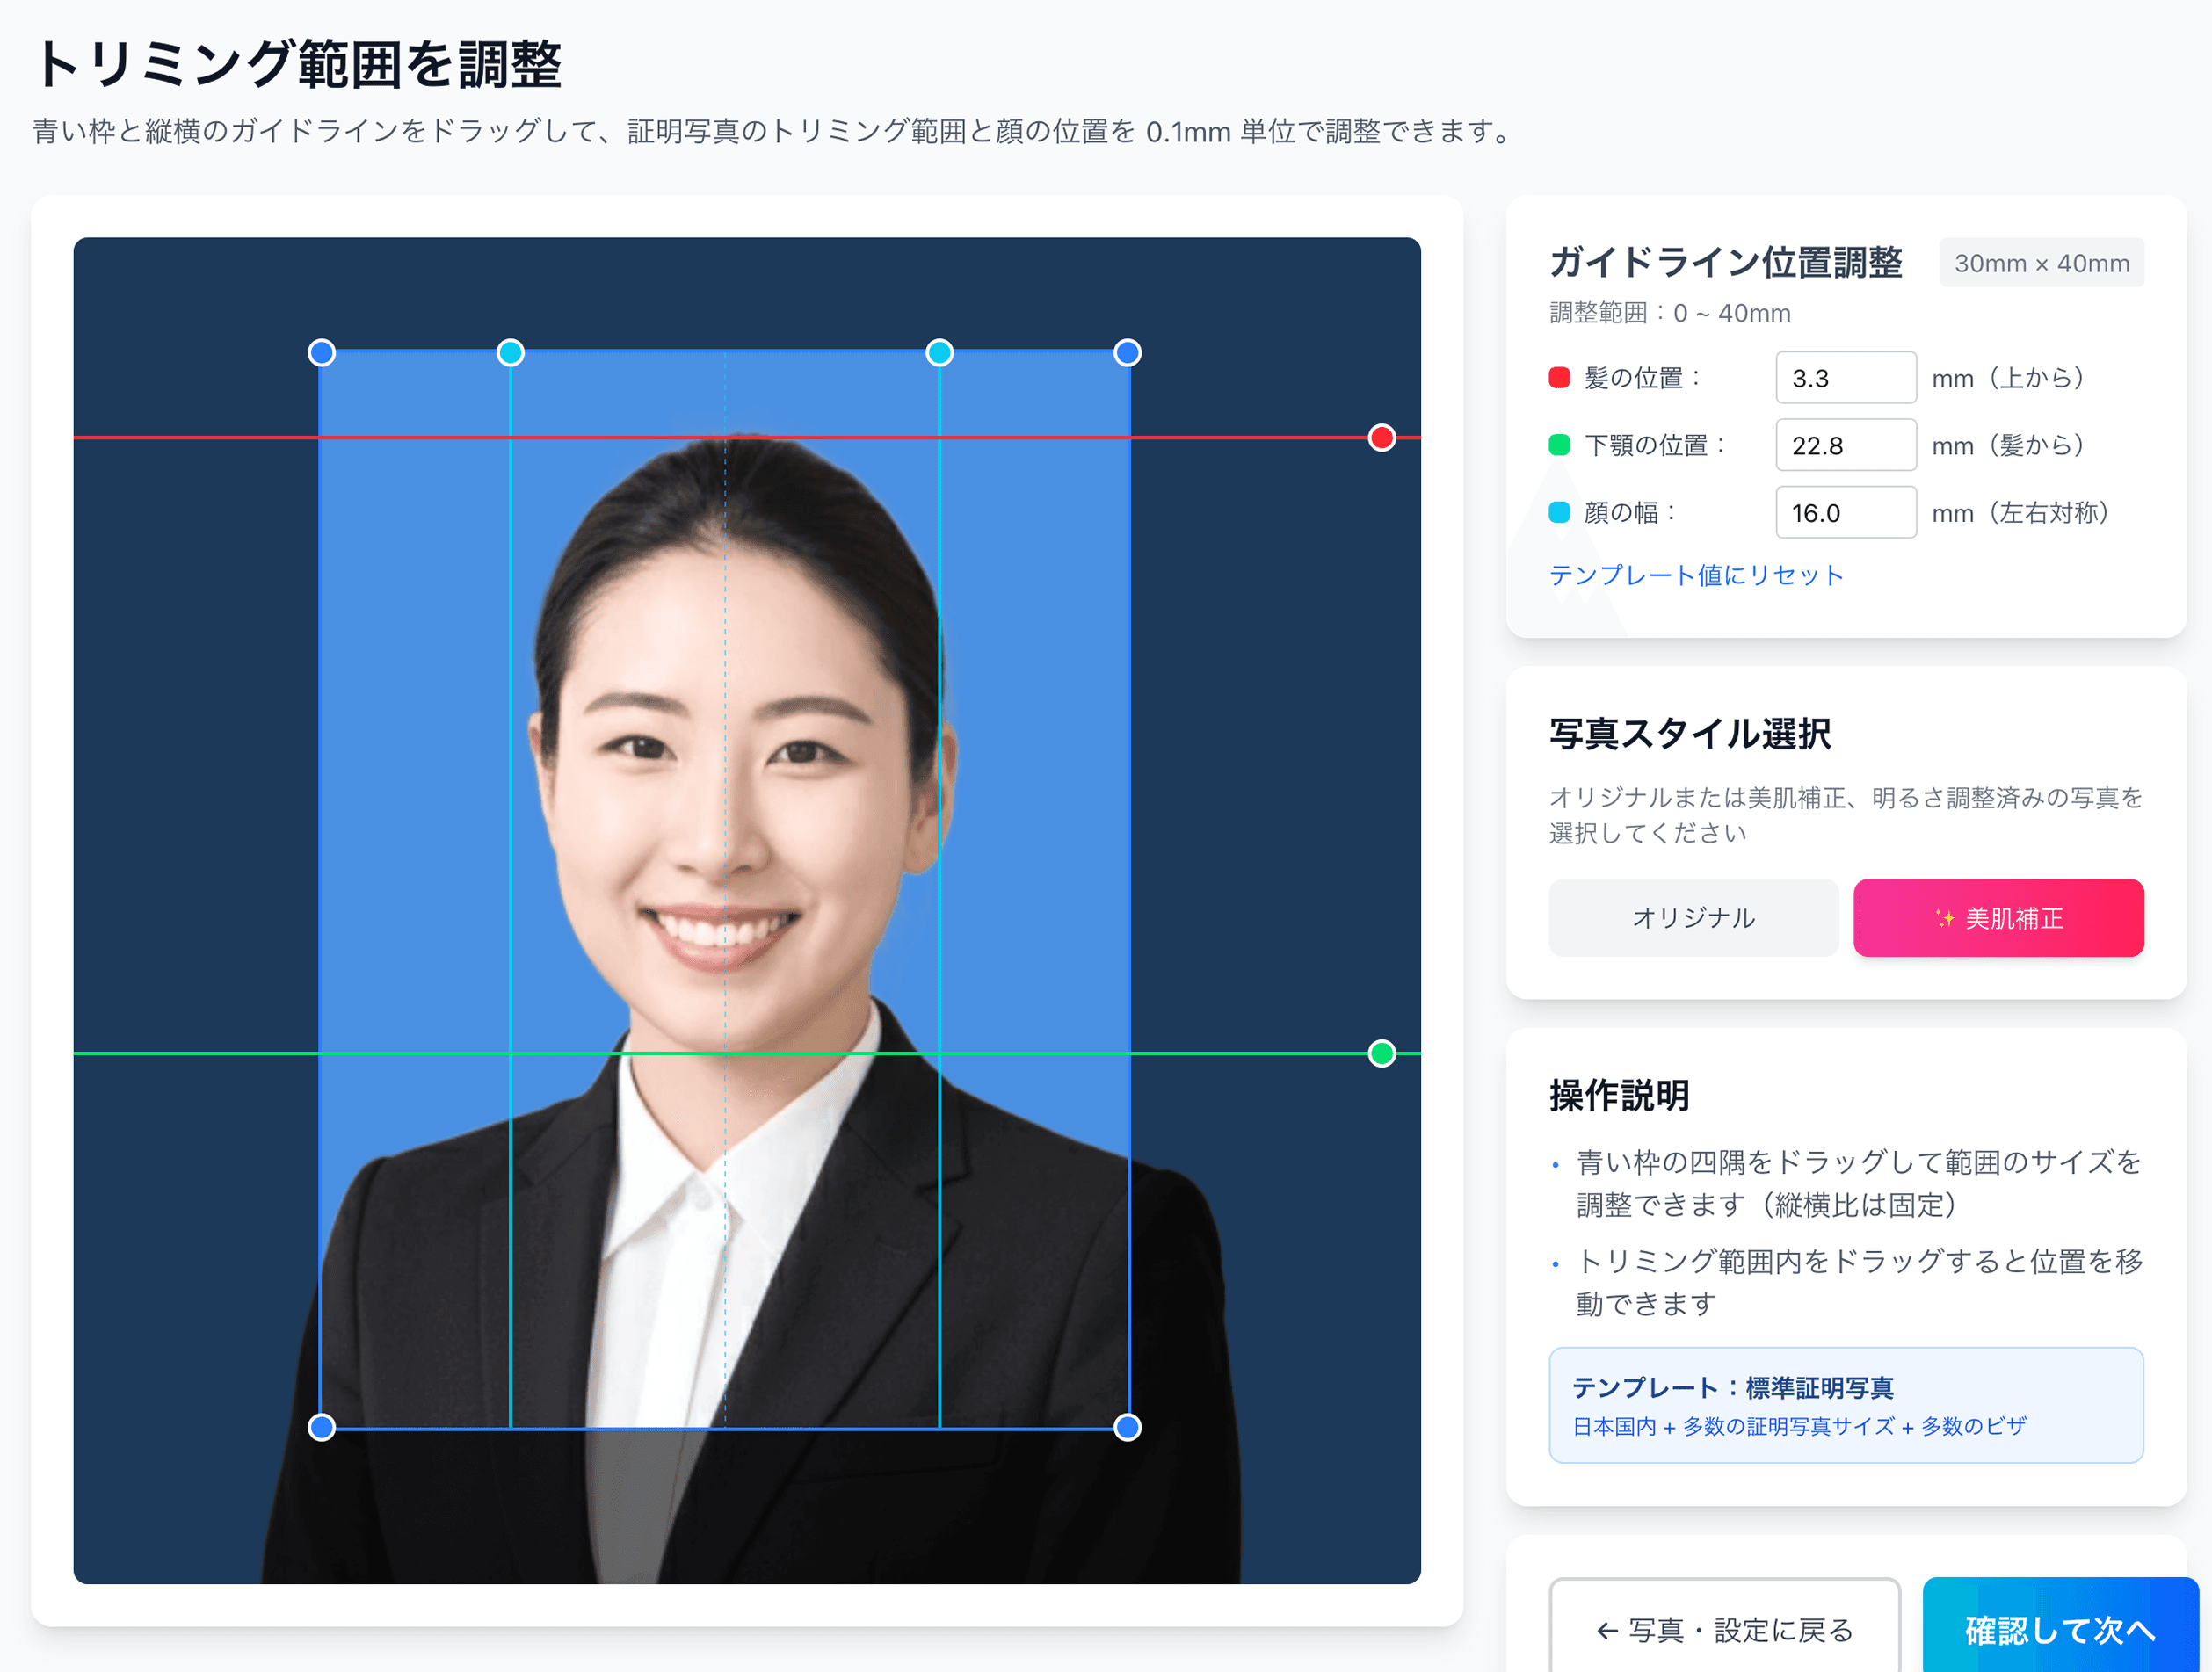
Fine-tune the face position in 0.1mm steps
To match the Ministry of Foreign Affairs’ infant allowance (the whole face including the ears, even under 32mm face height), the AI tentatively places the face. With the slider on the preview screen, you can finely adjust — in 0.1mm steps — where in the 2–6mm range to set the crown margin and how to align the left-right position of the face.
4
Reshoots are unlimited
If something in the preview bothers you, you can re-upload a different photo. There’s no extra charge even after payment. Adjust as many times as you like until you’re satisfied.
5
Pay ¥200 and receive the L-size print sheet
A sheet is generated with several 35×45mm photos laid out on a single L-size print. It comes with cut marks (trim lines), so just cutting with scissors gives you a photo exactly to spec. You can go straight to convenience-store printing via a QR code.
L-size convenience-store print at ¥30 ── in hand in 30 minutes
The finished photo can be printed via a QR code at the multi-copy machines of major convenience stores. Seven-Eleven (L-size ¥40) and Lawson / FamilyMart / Ministop (L-size ¥30) are supported (as of May 2026).
1
Show the QR code from the finished screen on your smartphone
Open, on your smartphone, the QR code shown on Ramune’s finished screen, or the link in the email you receive. There’s no hassle of carrying the photo data to the convenience store.
2
Head to a nearby convenience-store multi-copy machine
At Seven-Eleven, select the “Photo Print” menu; at Lawson or FamilyMart, select “Network Print.” On each machine, just hold the QR code up to the scanner and the image is transferred.
3
Select L-size (89×127mm) and print
Choose L-size for the paper size, insert the fee (¥30 at Lawson, FamilyMart and Ministop; ¥40 at Seven-Eleven), and press the print button. The photo paper comes out in 1–2 minutes.
4
Cut along the cut marks
Several 35×45mm photos are laid out within the L-size sheet, and just cutting along the cut marks (dotted lines) with scissors gives you photos exactly to spec. We recommend cutting 2–3 spares.
Don’t go out with the baby ── done entirely at home, ¥230
The shoot is 15 minutes after feeding or a nap. Everything from upload to payment is done at home, and even the convenience-store printing can be handled by just one family member. At ¥200 + ¥30, it’s one-tenth the cost of a photo studio, and reshoots are free as many times as you like.
You can apply as soon as the birth has been registered and recorded in the family register (roughly 1–2 weeks after the birth notification is filed). Even a newborn can obtain one once the required documents — a copy of the family register, a copy of the birth notification and so on — are in order. Note, however, that under the Ministry of Foreign Affairs’ practice, anyone under 18 is limited to a 5-year passport rather than the 10-year version.
My baby has a round face and the face height doesn’t reach 32mm. Will it be rejected?
As a special allowance for infants, the Ministry of Foreign Affairs states explicitly: “even if the vertical dimension is less than 32 millimeters, make sure the entire face, including the ears, is captured in the photo.” Rather than rejecting a photo for failing the strict 32mm threshold, examiners give priority to whether the whole face — the outline including both ears — is visible.
I shot it while the baby was asleep (eyes closed). Will it be accepted?
A photo with the eyes closed will be rejected. In the public guidance from the Ministry of Foreign Affairs and the prefectural passport centers, “eyes closed” is commonly listed as an unacceptable example. Even when shooting a sleeping baby, you need to draw their attention with a toy or a sound so they open their eyes toward the camera.
Is it okay to shoot while holding the baby?
Shooting while holding the baby is permitted, but “any part of the assisting person (the one holding the baby) appearing in the photo” is treated as unacceptable. You will need a workaround such as draping a white sheet or cloth over your own head to hide your body, or holding the baby from behind in front of a white wall. There is also the option of replacing the background with white using AI after shooting.
Are smiling or drooling photos a no-go?
A photo with an extreme smile (mouth open showing teeth, eyes narrowed) will be rejected. “A laughing-crying face where the normal facial expression cannot be confirmed” is also listed as an unacceptable example. A faint smile is sometimes allowed, but to be safe, a neutral expression with the mouth closed is the surest bet. As for drool, wipe it away frequently with gauze before shooting so it doesn’t blur the outline.
If the passport center points out that “a parent’s hand is in the photo,” what should I do?
You will need to reshoot on the spot. Many passport centers have counters open only on weekdays, so a return visit means taking another day of paid leave. If you reshoot at a quiet spot within walking distance of the center (a park bench, or in front of a white wall at a nearby acquaintance’s home), then use an AI tool to replace the background and print at a convenience store, you can get back to reapplying within 30 minutes. It’s a handy detour when your departure date is looming.
Doable even in the 1 week before a family trip ── meet the baby passport spec for ¥230 total
One smartphone at home, a 15-minute shoot after a nap, the background and face position fixed with AI, and a convenience-store print in hand 30 minutes later ── there’s no need to take the baby to a photo studio. Reshoots are free as many times as you like.