Contents
Sooner or later, living in Japan means standing in front of a camera for an ID photo. The residence card needs a fresh one each time you renew, and that is before you get to the My Number card, a driver’s license, or a change of visa status. None of it is difficult, but the rules are fussy in ways that are easy to miss — and a photo studio will charge you around ¥1,500 for a shot you have to go and collect during the week.
This guide covers the photos you’re most likely to need as a foreigner in Japan, the exact sizes set by the authorities, the mistakes that get photos sent back, and a way to make any of them from your phone for ¥200 — in English, without finding a studio.
The ID photos you’ll actually need
Different documents want different sizes, but the situations come up again and again once you live here:
- Residence card (在留カード). You’ll meet this one most often, since the card is reissued every time you renew or change your status of residence.
- My Number card (マイナンバーカード) — needed once when you apply, and again when the card or its certificate expires.
- Driver’s license: when you convert a foreign license (外免切替) or renew an existing Japanese one.
- Permanent residency (永住). Uses the same 4×3cm photo as the residence card. Naturalization (帰化) is the exception — it needs a larger 5×5cm photo (two copies), so don’t reuse your residence-card crop for it.
- Passport renewal: handled at your own embassy, so the size follows your home country’s rules, not Japan’s.
One selfie, taken properly, can be re-cropped to most of these sizes without going back to the camera — except naturalization, which stands alone at 5×5cm.
Exact sizes and the rules behind them
The sizes below come straight from the issuing authorities. The residence card spec is published by the Immigration Services Agency, and the My Number card spec by the Digital Agency and J-LIS.
| Residence card (在留カード) | 40 × 30 mm (4 × 3 cm) |
|---|---|
| My Number card | 45 × 35 mm (4.5 × 3.5 cm) |
| Driver’s license | 30 × 24 mm (3 × 2.4 cm) |
| Permanent residency (永住) | 40 × 30 mm (4 × 3 cm) |
| Naturalization (帰化) | 50 × 50 mm (5 × 5 cm) |
Two rules apply across almost all of them. The photo has to be taken within the last 6 months, and the background has to be plain with no shadow. The Immigration Services Agency wording is specific on this last point: the background must have nothing in it, shadows included.
Why ID photos get rejected
Most rejections come down to the same handful of issues. None of them are obvious on a phone screen, which is exactly why they slip through:
- Wrong size — usually the residence-card / My Number mix-up above.
- A shadow behind the head — even a faint one against a white wall. This is the most common background problem, because angled room lighting casts a shadow you don’t notice until the photo is cropped tight.
- Face too large or too small — the My Number card, for example, allows only a 4mm window for face height (32–36mm), which is almost impossible to judge by eye.
- Glare on glasses, or frames covering the eyes.
- An expired shot — reusing the photo from your last renewal, more than 6 months old.
- A hat, a big smile, or an open mouth — the expression rules are stricter than most people expect.
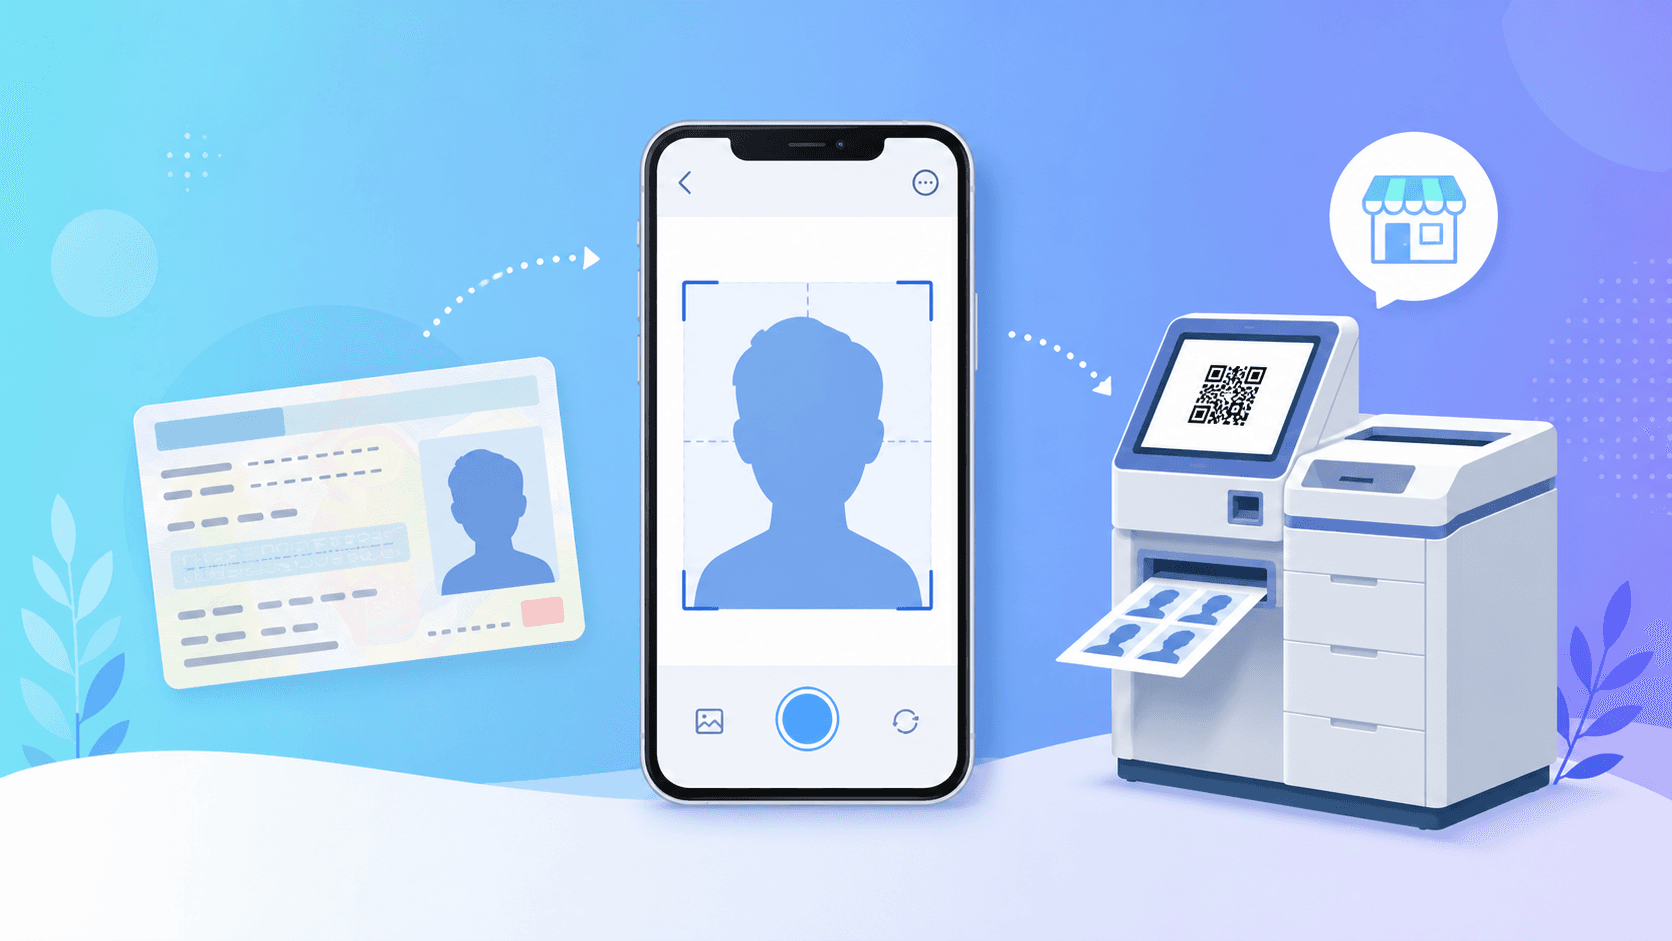
Making them at home for ¥200
You don’t need a studio or a station photo booth for any of this. The workflow is the same whichever ID you’re making:
- 1
Take a photo against a plain wall
Use your phone, face the camera straight on, no hat, neutral expression. A white or light-grey wall with even light works best. If it comes out badly, just take it again — that’s the advantage of doing it yourself.
- 2
Upload it and pick your ID type
Choose “residence card,” “My Number,” or whichever you need. The app removes the background and crops the photo to that exact size for you. It doesn’t invent a new face — it’s your photo, fitted to the spec.
- 3
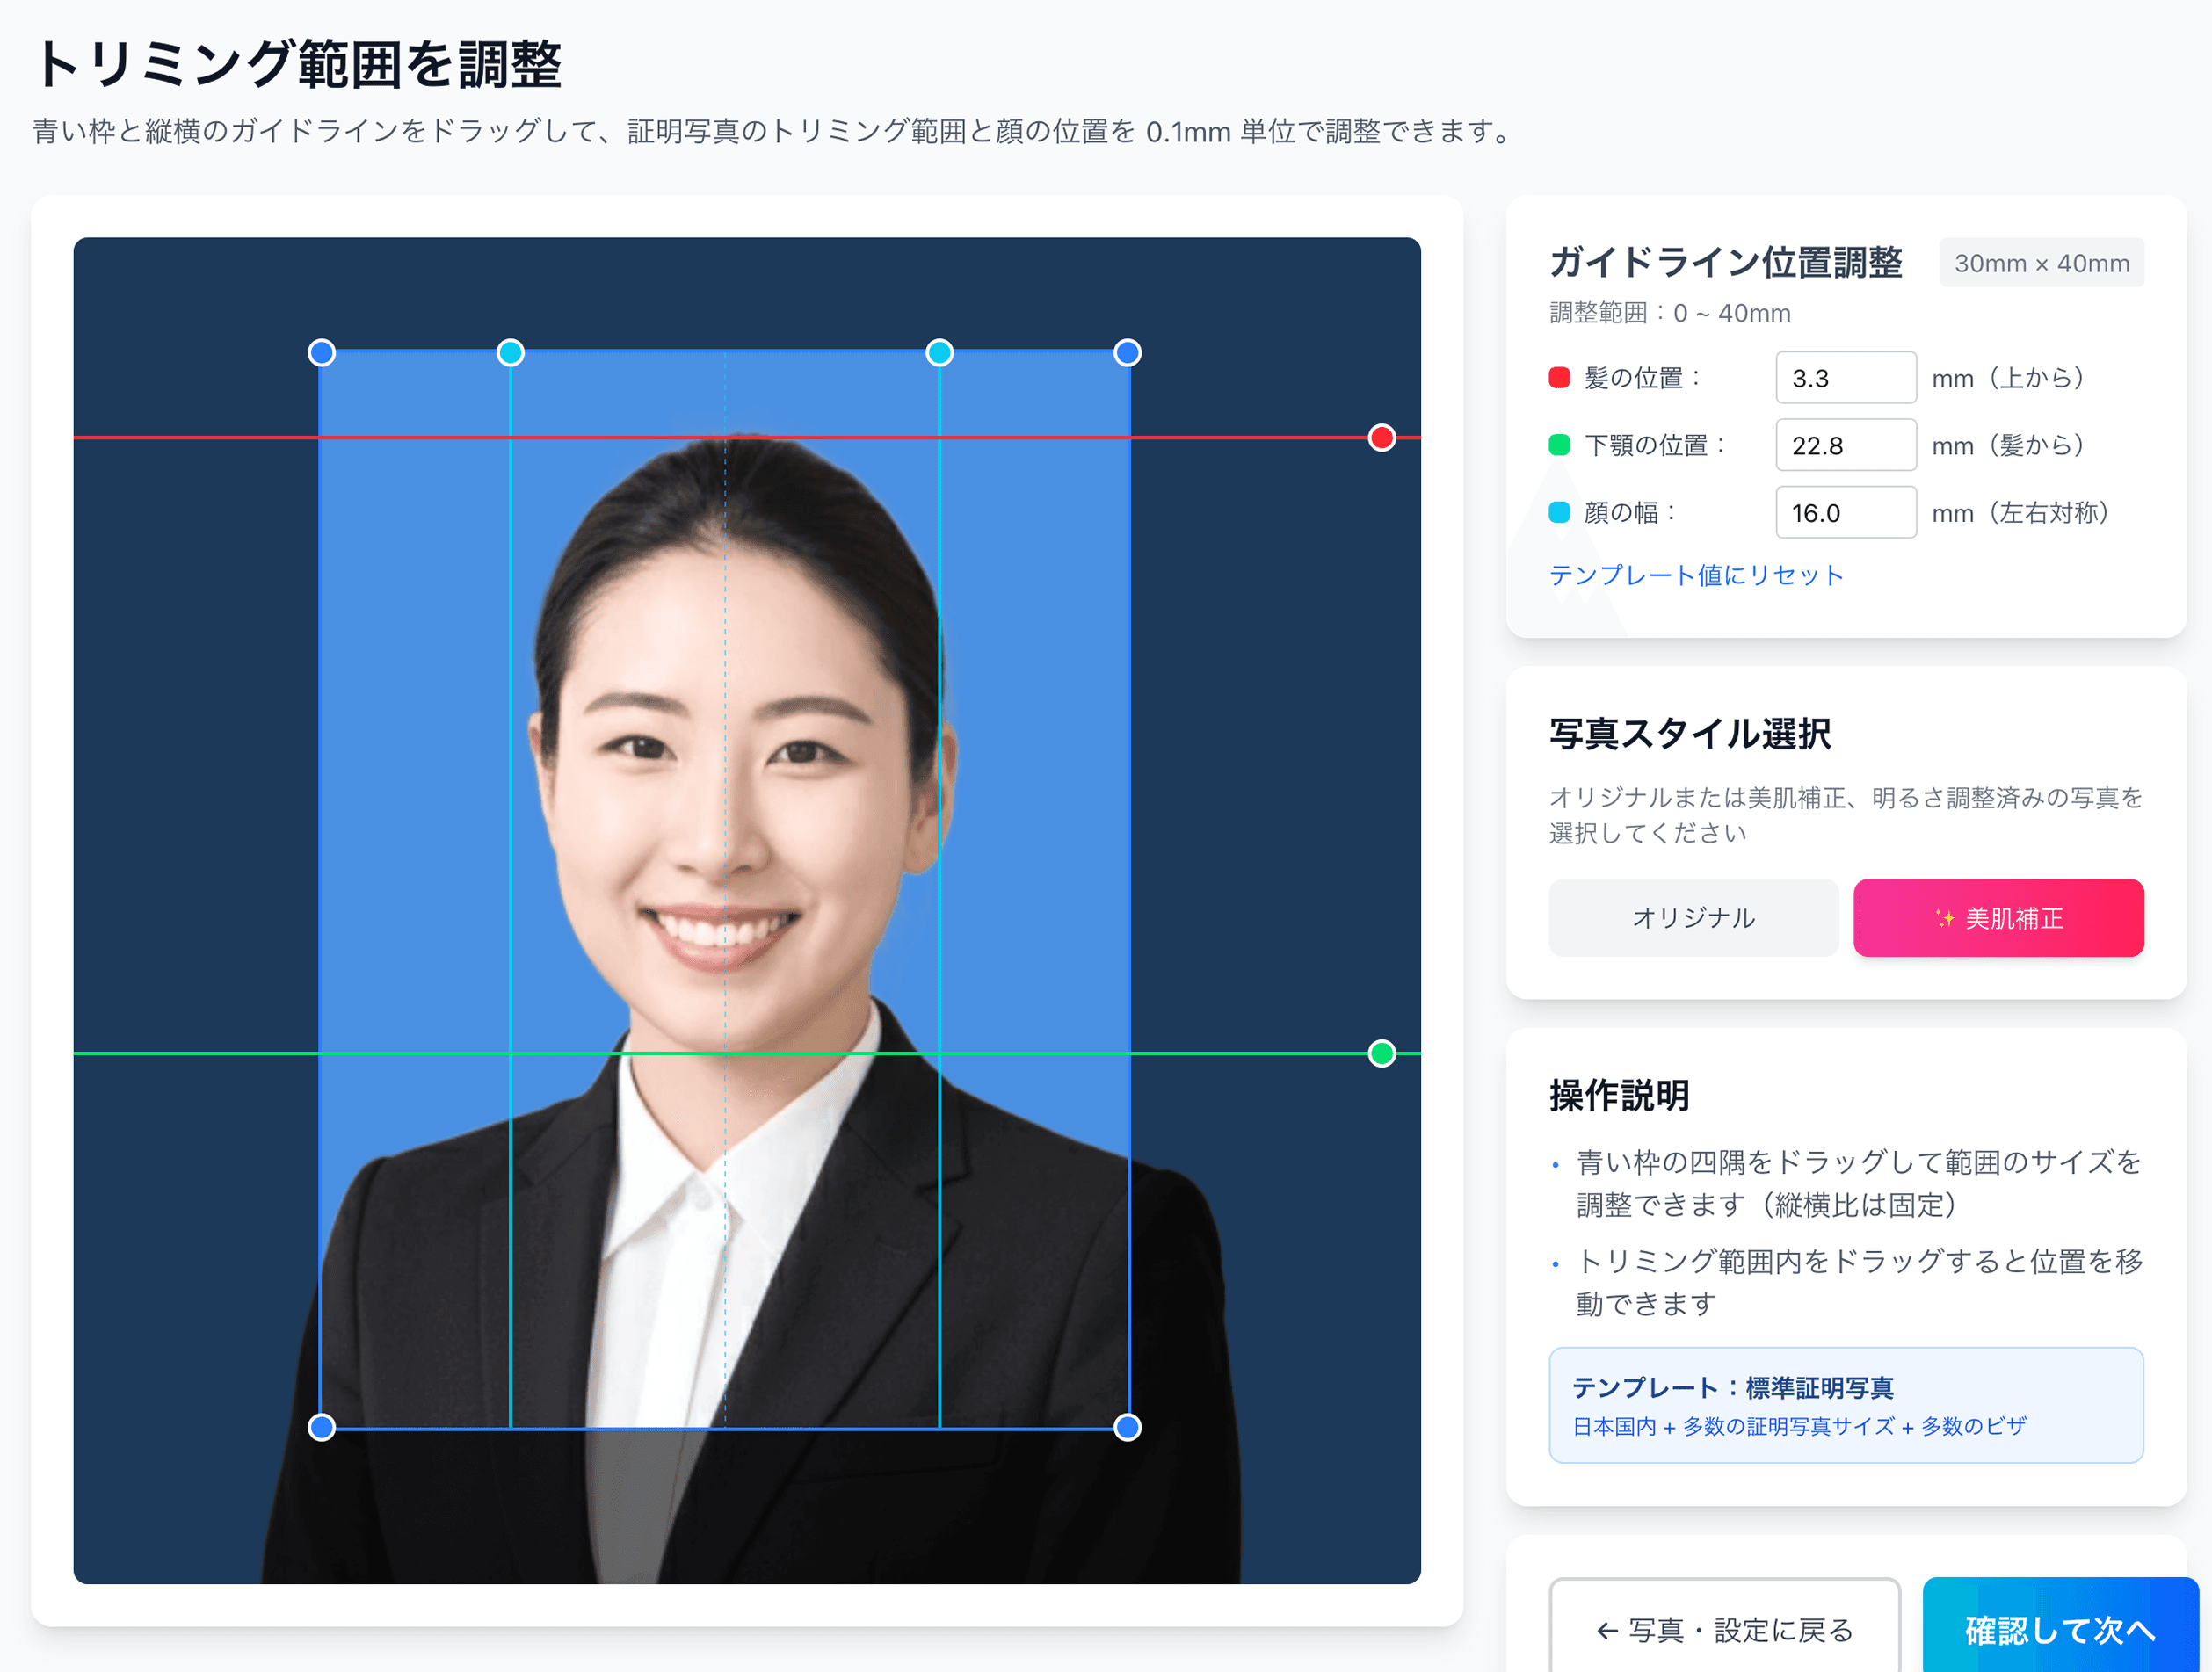
Fine-tune the position
Nudge your face up, down, or sideways to 0.1mm precision so the head height and margins land inside the official range. This is the step that fixes the “few millimetres off” rejections.
- 4
Pay ¥200 and get your print code
You receive a QR code and an 8-digit number by email. The sheet is laid out with cut marks so you can trim it cleanly to size.
- 5
Print at a convenience store
Hold the QR code up to the machine and print. An L-size sheet is about ¥30–40, and you cut along the marks. More on which stores below.
The whole thing is in English, so there’s no decoding Japanese menus, and because you can retake the photo as often as you like, you’re not stuck with a single booth shot you can’t redo.
Make a residence card photo for ¥200
Take a selfie, the app fits it to the 40×30mm residence card spec, and you print at a convenience store. In English, with unlimited retakes.
Create my ID photoPrinting at a convenience store
This is the one part where the store matters. Ramune gives you a QR code that works directly with the Sharp network-print machines at Lawson, FamilyMart, Ministop and Poplar — hold up the code, print, done.
An L-size print costs about ¥30–40 depending on the chain, and a single sheet fits several copies of an ID photo, so you usually have spares for the next form.
What it actually costs
The full price is the ¥200 app fee plus the convenience-store print — not ¥200 all in.
| Ramune + convenience-store print | ¥200 + ~¥30 |
|---|---|
| Station photo booth | ¥800–1,000 |
| Photo studio | ¥1,500–5,000 |
Useful links
- Residence card photo spec
- My Number card photo spec
- Driver’s license photo spec
- All ID photo specs
- Convenience-store printing guide
- Pricing
FAQ
What size is a residence card photo in Japan?
Can I use the same photo for my residence card and My Number card?
Do I need to read Japanese to make an ID photo this way?
Where can I print the photo, and how much is it?
How recent does the photo have to be?
Can I keep my glasses on?
Can I upload the same photo for online applications (My Number online, residence card online system)?
ID photos in Japan, from ¥200
Pick the document, take a selfie, and the app handles the size and background. About ¥230 to a printed photo, and you can redo it as many times as you need.
Create my ID photo nowRamune Editorial ・ Published: June 1, 2026
Facts in this article are verified against primary official sources before publication.